Convert Your Guitar to Stereo Using This Pro Mixing Tip (No Rewiring Required!)
Create a spacious stereo image in your DAW for free

All the latest guitar news, interviews, lessons, reviews, deals and more, direct to your inbox!
You are now subscribed
Your newsletter sign-up was successful
Although we live in a stereo world, most electric guitars have a mono output jack.
While it’s possible to run that mono signal through stereo effects like reverb, chorus and delay, it would be cooler to make the guitar output itself inherently stereo without having to do something like rewire two different pickup outputs to a stereo jack.
And it would be even cooler still if the stereo output collapsed perfectly to mono, without phase changes, and without using time-based effects.
As for the cost of doing this, how does “free” sound? Yeah, I thought you’d like that.
As it happens, Voxengo makes several free plug-ins (including an amp sim and tube saturator), as well as commercial plug-ins that are well worth the money they cost.
The one we’re interested in is the Marvel GEQ, a linear-phase, stereo graphic equalizer. You can download it, with no strings attached, here.
The Marvel GEQ features two graphic EQs, one for each channel. For our stereo guitar conversion, we’ll turn down every other graphic EQ band on the left channel; for the right channel, we’ll turn down the opposite set of alternating bands. This divides the guitar into different frequency bands, and by assigning them to the left and right channels, we can create a stereo image.
All the latest guitar news, interviews, lessons, reviews, deals and more, direct to your inbox!
To do this, you’ll need to create a stereo track in your DAW. This may be an issue if you recorded the guitar in mono, but fortunately most DAWs can convert mono into dual mono, in which the same audio is heard in the left and right channels.
For example, to convert a mono track in Presonus Studio One, set the track mode to stereo, and bounce the track to itself. Done.
EQ Setup
The Marvel GEQ is quite sophisticated and can handle multiple audio streams.
To set it up for guitar, we need to assign the left and right channels to their own groups, so we can edit them independently.
Click the downward-pointing arrow to the right of the presets button, and choose Factory ROM > Default.
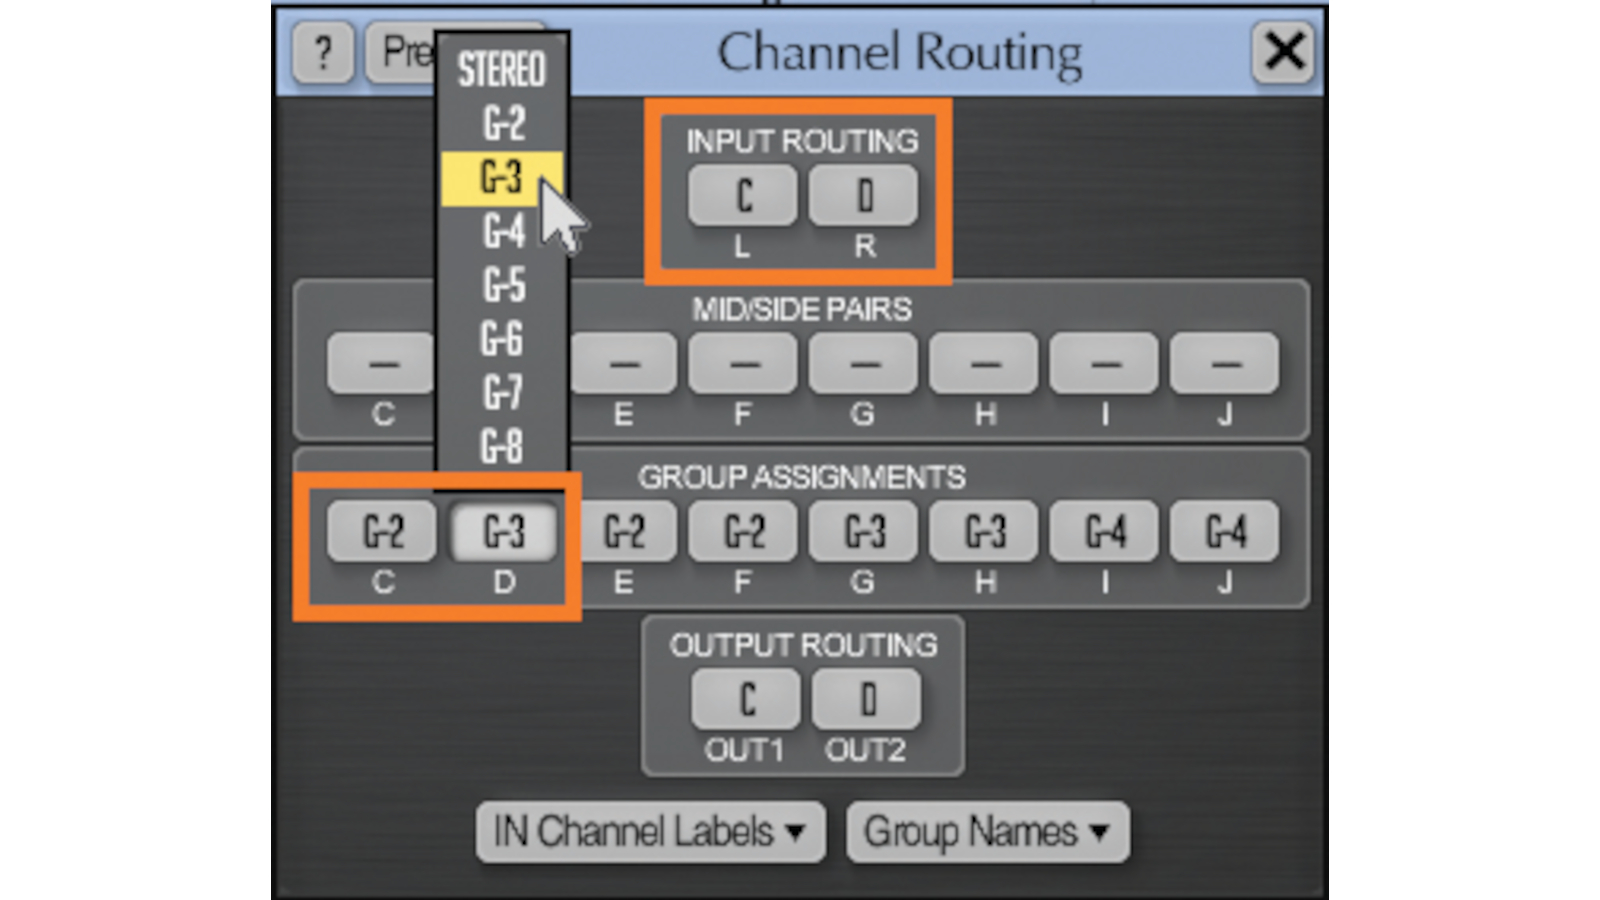
Click the Routing button. Note that in the Input Routing section, C is associated with the left channel, and D with the right channel.
Click on C in Group Assignments and choose G-2 from the pop-up menu.
Click on D in Group Assignments and choose G-3 from the pop-up menu. Your routing window should now look like this:

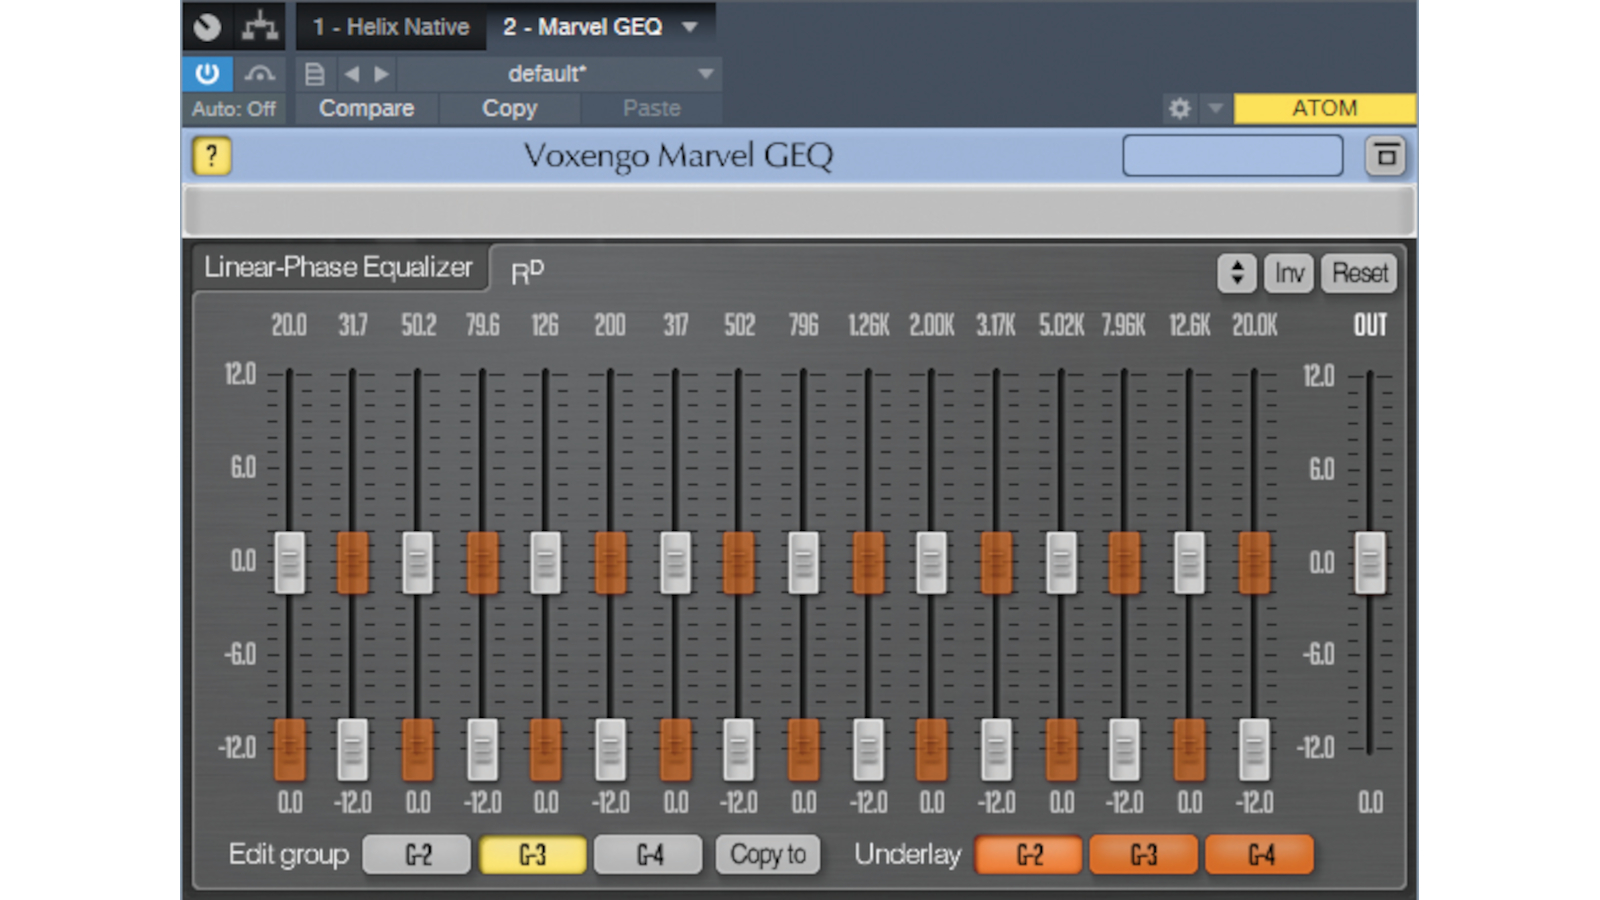
Click on the Marvel GEQ interface, and then click the Edit Group G-2 button to edit the right channel.
Drag the 20Hz fader and all alternate faders – 50.2Hz, 126Hz, 317Hz and so on – to -12dB.
Click on the Edit Group G-3 button to edit the left channel. Drag the 31.7Hz fader and all alternate faders 79.6Hz, 200Hz, 502Hz, etc. – to -12dB as below:

You now have a stereo image!
You’ll find that with more harmonically complex sounds, such as distorted power chords, the imaging will be more dramatic.
And of course, you can “weight” certain frequencies toward the left or right, or “bi-amp” the audio by assigning, for example, all lower frequencies to the left channel, and all higher frequencies to the right channel.
Experiment and see what works best for your application.
