Ever since Bud Isaacs attached a pedal to his electric lap steel guitar and crafted the iconic intro to Webb Pierce’s 1956 hit “Slowly,” the sound of a metal steel pressed against a guitar’s strings has become synonymous with country music.
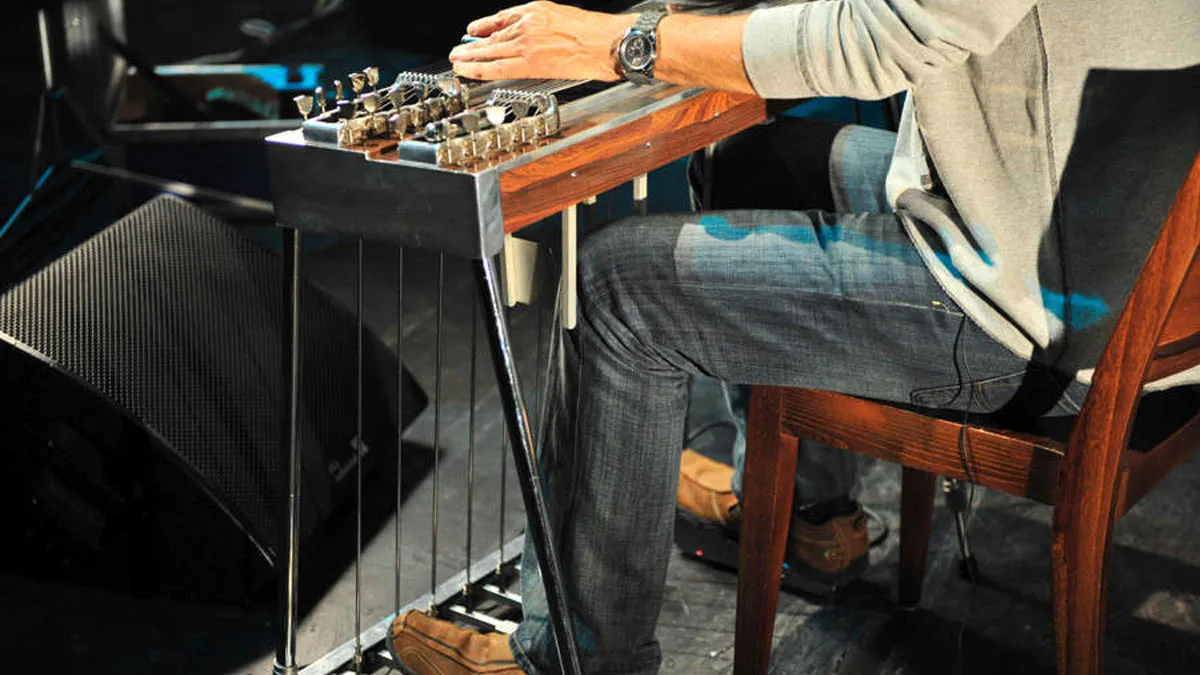
Since then, the pedal steel guitar - the lap steel’s cousin - has become an essential instrument within the genre. For those unfamiliar with this marvelous invention, the pedal steel guitar (hereafter referred to simply as the pedal steel) is an electric guitar-like instrument with one or two necks fixed to a tabletop, and featuring anywhere from eight to 14 strings.
It’s played not by fretting and strumming but by fingerpicking the strings, using a thumbpick and metal fingerpicks, and sliding a smooth, solid metal bar, known as the steel, up and down the string with the other hand.

The instrument’s signature pitch bends, known as mechanical bends, are achieved using a system of foot- and knee-operated pedals and levers that are calibrated to precisely raise the pitch of certain strings by either a half step or a whole step.
One of the most commonly used techniques in pedal steel playing involves employing these mechanical bends in tandem with stationary notes on other strings to create oblique bends within two- or three-note chords (comparable to oblique voice leading, in which one note moves while another note remains stationary).
Creatively played and mastered by such legendary musical innovators as Buddy Emmons, Tom Brumley, Ralph Mooney and the aforementioned Bud Isaacs, the pedal steel, with its perfectly in-tune bends, smooth portamentos (pitch slides) and gently warbling chord vibratos, provided a key musical ingredient to the celebrated, soothing sound of classic country music.
It also inspired an entire generation of modern country lead guitarists to borrow from its vocabulary of slick licks and try to emulate them on their own instruments, using string bending and other standard guitar-playing techniques.
In this lesson, we’ll look at some cool ways to mimic the sound of the pedal steel and explore the mechanics of performing pedal steel–style licks on the guitar. But first, let’s begin with…
Tone
Reproducing the pedal steel’s clear, bell-like and buzz-free tone on a guitar is a near-impossible task, but you can closely approximate it and in the process combine the essence of the two instruments’ unique characteristics in a way that gives you the best of both worlds.
Start by plugging a solid-body electric guitar into a clean tube amp with spring reverb, such as a Fender Deluxe or Twin, with either the middle pickup or neck and bridge pickups selected. This should give you plenty of both warmth and twang. A touch of soft delay and compression may be added for extra tonal bliss and smoothness.
One of the hallmarks of the pedal steel sound is the “weeping” volume swell, heard on countless country ballads from the late ’50s to the late ’90s and beyond. This can be achieved using either your guitar’s volume knob or a foot-operated volume pedal, placed before the time-based effects in your signal path.
A Strat-style guitar works best for volume-knob swells, as the knob’s close proximity to the strings enables you to easily reach it and cradle it with your pinkie while picking the strings.
On other types of guitars, such as a Telecaster or Gibson Les Paul, on which the volume knob is located a couple of inches farther away from the strings, working the knob requires you to momentarily move your pick hand away from the playing position, which interrupts what you’re playing.
In this case, you’ll probably find that using a volume pedal works best for quick, smooth swells and fades. We’ll practice volume swells in the exercises to come, but now let’s move on to the fundamentals of…
Mechanical Bending Technique
The most challenging aspect of mimicking the sound of the pedal steel is performing its smooth, precise mechanical pitch bends using your fingers to push or pull one or more strings sideways, which is how you bend a note with your fingers on the guitar.
Where rock and blues lead players often play around the target pitch of a bend, through the use of finger vibrato, mechanical bends require spot-on intonation, which means eschewing finger vibrato altogether.
You can, however, use a tremolo bar to try and mimic the gentle back-and-forth vibrato of a slide, especially when applied to double- and triple-stop licks, so that all the notes modulate up and down in pitch in lock-step fashion.
Performing a mechanical bend demands as much from your ears as from your fingers, which brings us to Ex. 1. Here, in each bar, you’ll first play an unbent fretted note, which will serve as an aural reference point and target pitch for a bend that follows.
You’ll then perform a double-stop oblique bend, for which the lower note rises by either a half step (the equivalent of one fret) or a whole step (the equivalent of two frets, indicated by the word full) to match the pitch of the unbent note you previously played.

Each bend here is performed by pushing the lower string upward, away from the palm and the higher string. Be careful not to disturb the higher string and inadvertently bend it too.
When possible, try using two fingers to bend a string instead of just one, with the additional, supporting finger placed one fret lower.
This reinforced fingering helps anchor and stabilize a bend, providing better pitch control, and it will make bending easier, which is a big plus, as performing several bends in a row can fatigue your fingers, especially if they’re not particularly strong and conditioned to bending, or if your strings and setup are on the stiff side.
As is always the case when string bending, the key is to listen closely to the rise in pitch and let your ears guide your finger muscles and tell them exactly how much pressure to apply to the string
Lighter, “slinkier” string gauges, such as a set of .010s or .009s, make bending much easier to do than it is on thicker strings, such as an .011 set.
I’ve included suggested fret-hand fingerings below the tablature for each example. Notice the “2(+1)” or “3(+2)” indications for some of the bends. These represent the use of an additional finger to help push the string.
As is always the case when string bending, the key is to listen closely to the rise in pitch and let your ears guide your finger muscles and tell them exactly how much pressure to apply to the string to reach the target pitch and not overshoot it.
Play and listen to the reference tone, then play the double-stop and gradually bend the lower note up to the target pitch. As you acquire the feel and muscle memory for each bend, gradually speed up the exercise.
If the double-stop sounds particularly tense, then you’re likely over- or undershooting the bend, rendering the pitch too sharp or too flat, in which case you’ll need to adjust your touch accordingly.
Regarding the pick hand, since pedal steel players pick with their fingers (using fingerpicks) and a thumbpick and often pluck two or more strings together at the same time, to achieve a keyboard-like simultaneous note attack, the included picking notation here indicates the use of hybrid picking, for which a flat pick is used in conjunction with the middle and ring fingers (and occasionally the pinkie, too).
Oblique bends can be challenging to play, because you have to make sure the stationary, unbent tones do not move and “go along for the ride.”
Depending on the shape you’re forming with your fretting fingers, this can be taxing on them, so when learning and practicing the bends in this lesson, ease into the shapes and try to keep your fingers and wrist relaxed, while also making sure your grip on the strings is firm enough to fret the notes cleanly.
In general, when push bending, you’ll also find it helpful to press your thumb firmly against the back of the neck, near the low E string, to form a solid clamp on the fretboard.
Once you can perform these double-stop oblique bends comfortably and accurately, it’s time to tackle some more challenging and richer-sounding triple-stop oblique bends.
Ex. 2a presents, in the key of A major (A major scale: A, B, C#, D, E, F#, G#) a series of triple-stops that outline a I - IV - V - I progression: A - D - E - A.
Each triple-stop is played on the top three strings and has two stationary chord tones on the B and high E strings, which are either the root, 3rd or 5th of the chord, and one non-chord tone played on the G string that bends up to a chord tone from either a half step or whole step below.

The D-to-E bend in bar 3 is the most technically demanding one to execute here, as it’s performed with just the index finger (1). But, fortunately, that is the strongest finger, so go for it and push that string!
Building on the presentation template of the previous exercise, Ex. 2b has you forming standard A, D and E triad shapes on the same strings, only now you will pre-bend the note on the G string from a chord tone up to a non-chord tone that is either the 6th, 4th or 2nd of that triad, pick the three strings, then release the bend to resolve it downward to the chord tone you’re fingering.

Pre-bending takes some practice to get the hang of and perfect, as you’ll need to learn how to anticipate exactly how much pressure to apply to the string without being able to hear what you’re doing until it’s too late to make any adjustments. Repetition and muscle memory development will certainly help in this regard.
Ex. 2c takes our same A - D - E - A progression and moves everything over to the A, D and G strings with another sequence of oblique triple-stop bends.
Each bend is still played on the G string, only now it’s the top note of the triad shape and we’re pulling the string downward, in toward the palm, instead of pushing it, and bending away from a chord tone then releasing the bend back down to it.

In our next offering, Ex. 2d, you will again stay on the A, D and G strings and pull the G-string note down to bend it. Only now you are to pre-bend from a non-chord tone up to a chord tone, pick the strings, release the bend then re-bend back up to the chord tone.

The whole-step D-to-E bend in bar 3 is technically demanding, additionally requiring a wide fret-hand stretch, so ease into it and be patient if you can’t nail it right away. Your finger strength and flexibility should improve with practice, aided by muscle memory.
Try to time the volume swell to begin immediately after you pick the strings... You’ll be making your guitar gently weep with the best steel players out there
If you’re really struggling with this move, one option (in addition to switching to a lighter string gauge) is to move the D note up one fret, to D# at the 8th fret, and substitute a half-step bend for the whole-step one. For added effect, try playing this exercise or any of the previous ones with a volume swell on each chord.
Try to time the volume swell to begin immediately after you pick the strings, so that the fade-in doesn’t miss or overshadow most of the bend. This can be tricky to do at first, but once you get the hang of it, you’ll find that it’s fairly easy to do, and you’ll be making your guitar gently weep with the best steel players out there.
Now let’s check out some licks that utilize these kinds of double- and triple-stop bends and explore some other sounds and techniques that pedal steel players have inspired electric guitarists to try and imitate.
Pedal Power
Another hallmark of the pedal steel sound is the way in which it offers the player the uncanny ability to blend single-note phrasing with a layered, ringing, chord-like sound. This is customarily achieved by tuning the strings to a chord, such as E9 or C6, for which certain adjacent strings are tuned in close intervals, specifically only a whole step, or major 2nd, apart.
Such tuning schemes allow the performer to play a minimal number of successive notes on each string and sustain clusters of notes sounded in succession on different strings, typically with oblique bends cleverly added to the proceedings.
So how can we electric guitarists replicate this effect on our instrument and in standard tuning?
One effective approach is to connect overlapping double-stop and triple-stop shapes that include oblique bends and break the notes out into a melodic line while striving, where possible, to hold onto previously played notes so that they ring into ones you’re now picking on a different string.
Ex. 3 demonstrates this approach with a line that outlines G major pentatonic (G, A, B, D, E) and G Mixolydian (G, A, B, C, D, E, F) tonalities, with an added b3 blue note, Bb, added at the end, bending up to the major 3rd, B, while the G root note rings above it.

The phrase is played entirely in 12th position and has you linking together bent and unbent notes on different strings by continuing to hold onto notes you’ve already played. The bends in the first two bars are push bends, and the final one, in bar 3, is a pull bend. The concept here is: any note that can ring out, should.
Ex. 4 presents a similarly “slippery,” ringing single-note line, this one in the key of C, and uses notes from the C Mixolydian mode (C, D, E, F, G, A, Bb), with the b3 blue note added (in this case, Eb), again bending up to the major 3rd (E).
Throughout this example, we’re additionally incorporating quick, descending position shifts into the line to work our way progressively down the fretboard.
As with the previous examples, pay close attention to the suggested pick-hand articulations and fret-hand fingerings, and try to make the position shifts sound as seamless and unnoticeable as possible.
When shifting, momentarily relax your grips on the strings but without letting go of them, so as to minimize friction and drag.

Switching to the key of E major, Ex. 5 is built from a sequence of double- and triple-stops played in a broken-up, layered manner, similar to arpeggiated chords.
The biggest challenge here is smoothly shifting positions at the end of each bar and holding the reinforced oblique bend in bar 3 while playing the F# note on the high E string. The final bend (D string, 4th fret) may be performed by either pushing or pulling the string. Use whichever technique works best for you.

Ex. 6 brings us back to the key of G and incorporates some slick sleight of hand, featuring a series of pull and push oblique bends, position shifts and sneaky finger slides and climbs.

The decision of whether to push or pull the G string for any given bend is dictated by whether the other held notes are on the neighboring lower or higher strings. (Always bend away from other notes.)
Our final offering, Ex. 7 melodically describes an A7 tonality (A, C#, E, G) with notes drawn from the A major pentatonic scale (A, B, C#, E, F#) and the A Mixolydian mode (A, B, C#, D, E, F#, G), plus the b3 blue note, C, which decoratively slides up to the major 3rd, C# at the end of bar 2.

Note the use of string skipping here, which lends the line an angular, interesting melodic contour, and the descending chromatic passing tone, F, in the final bar.
Once you master these oblique-bending techniques, you will not only be able to bend steel with the best of them, you will also have a more developed musical ear, stronger hands and more control over your instrument than you probably ever thought possible. Now go make ’em weep!
