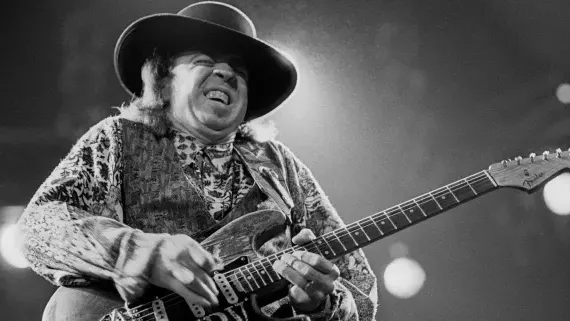
We’ve all seen “blues face” - that gruesomely contorted grimace that suggests the guitarist behind it is expressing their deepest feelings and untold emotional pain via the guitar.
But it’s just as likely that the source of that agony is the amount of effort required to bend the heavy-gauge strings that so many blues guitarists seem to prefer. (Consider Stevie Ray Vaughan: he used heavy-gauge strings, and his blues face was among the most intense - see above.)
String bending is an essential technique for blues, rock and country guitarists. Next to vibrato, it’s perhaps the most expressive technique guitarists have at their disposal. Its purpose is to give your melodies a vocal, or “singing,” quality.

The concept is simple: by pushing or pulling the string across the fretboard while fretting and picking a note, you raise that note’s pitch in proportion to the increased tension on the string.
There are several types of bends you should master, including single-string and double-stop bends, ghost bends (also known as pre-bends) and unison and oblique bends. In this lesson, you’ll learn first how to achieve proper intonation of your bends. Then we’ll dive into the basics for all of the above techniques.
Proper Intonation
One of the keys to effective string bending is proper intonation - that is, the ability to nail the desired pitch of the bend. Achieving proper bend intonation boils down to two things: a good ear and muscle memory. The first couple of exercises here enable you to work on both.
FIGURES 1A–C demonstrate half-, whole- and one-and-a-half-step bends. In measure 1 of each, play the root note (the note you will bend) first, followed by the target note. In measure 2, bend the root note up with your fret hand’s 3rd finger until it matches the target pitch you just played. You should use your 1st and 2nd fingers to assist in the bends and to support your 3rd finger. You can also wrap your thumb around the top of the neck for extra leverage, especially on wide-interval bends. Listen closely to the fretted target pitch, and try to get a feel for the amount of force necessary to bend the string.
Generally, guitarists play bends with either their 3rd or 4th fingers, with help from the 1st and 2nd. However, it’s important that you be able to bend using any of your fret-hand fingers.
FIGURES 1A–C

In FIGURE 2, perform all 5th-fret bends with your 1st finger, all 6th-fret bends with your 2nd finger and so on. For those played with your 1st finger, be sure to use your thumb to produce counterforce.
FIGURE 2

FIGURE 3 offers a short melodic example that calls for 2nd-, 3rd- and 4th-finger bends.
FIGURE 3

Keep in mind that once you bend a string, you generally need to do something with it. There are three common options: You can just hold it, as in FIGURE 3; add some vibrato, or simply release it to the original pitch, as in FIGURE 4.
FIGURE 4

Ghost Bends
We’re not talking poltergeists or Casper here. A ghost bend involves a silent pre-bend to pitch before it’s struck.
So, how do you know that the string is at the right pitch before you strike it? That’s where muscle memory comes in, and the only way to get there is through practice.
FIGURES 5A–C are similar to FIGURE 1, except that here you’ll play the higher-pitched note first, followed by the note to which your bend will be released. Next, you’ll pre-bend to the higher pitch, matching the fretted pitch you played before it, and then release the bend to the fretted note.
FIGURE 5A–C

The country-flavored southern-rock lick in FIGURE 6 illustrates a familiar context for these bends. A classic example of a ghost bend is heard in the famous intro to the Beatles’ “Something.”
FIGURE 6

Unison Bends
Our first excursion into two-string territory not only sounds cool but also helps reinforce good intonation. A unison bend is achieved by bending one string until its pitch matches that of a second fretted note played on an adjacent string. Unison bends are most commonly performed on string sets 1–2 and 2–3. Unison bends can be heard in Jimi Hendrix’s “Manic Depression.” In the lead up to the solo, he begins at the 5th-fret position A note and moves up the neck with unison bends, until he’s at the 17th-fret A, one octave higher than where he started.
FIGURE 7 features unison bends ascending the C major scale. The first time through the figure, play the bent note and the stationary note individually, as written. On the second time through, hold the bent note while you play the stationary one, so that you can hear the two strings together. This will highlight your intonation.
FIGURE 7

FIGURE 8 is composed of unison bends that climb the E minor scale (minus the 6th, C). The bends on string set 2–3 should be performed with your 3rd finger on the 3rd-string notes and your 1st finger on the 2nd-string notes. For those on string set 1–2, fret each 1st-string note with your 1st finger, and for the bends on the 2nd string you have two options: You can use your 4th finger as position playing dictates, or you can use your 3rd finger, as most guitarists do. Give both methods a try and see which is more comfortable for you.
FIGURE 8

Oblique Bends
An oblique bend is another technique involving two (or more) strings, where one is bent and the other is not. This bend is heard most commonly in classic rock and country music, where it mimics pedal-steel bends. Whereas you typically play the stationary note in a unison bend with your 1st finger, that note is generally played with your 3rd or 4th finger in an oblique bend. The most popular form for an oblique bend occurs on string set 2–3, like the country cliché in FIGURE 9.
FIGURE 9

FIGURE 10 on the other hand, has a bit more of a classic rock bent to it.
FIGURE 10

Double-Stop Bends
A double-stop bend requires that two strings be yanked at once. To do this, you can either assign one fret-hand finger to each string or, as is more common, use a one-finger barre for both notes. When using one finger, pull the strings down (toward the floor). This approach is less likely to result in string slippage or sloppiness.
An interesting phenomenon occurs when you bend a double-stop with a one-finger barre: the pitches are raised to different degrees. For example, in the funk-blues riff of FIGURE 11, the F note on the 3rd string is bent a whole step, to G, while the A note on the 2nd string is bent a half step, to Bb. (Note that both are chord tones of C7.) Perform this bend with your 3rd finger barred across both strings.
FIGURE 11

And remember: Although precision is desirable, double-stop bends are often used as musical exclamation points, so the most important ingredient is a healthy dose of attitude.
Quarter-Step Bends
Last, but certainly not least, is the quarter-step bend. Used primarily on the b3rd and b7th in a blues or blues-rock context, this bend produces the “true” blue note. Since its pitch sounds halfway between adjacent frets, it takes only a nudge of the string to hit this quarter-step bend, as demonstrated in the bluesy riff of FIGURE 12.
FIGURE 12

Finally, FIGURE 13 contains a little of everything. Remember, strive for good intonation - out-of-tune bends suck.
FIGURE 13

